

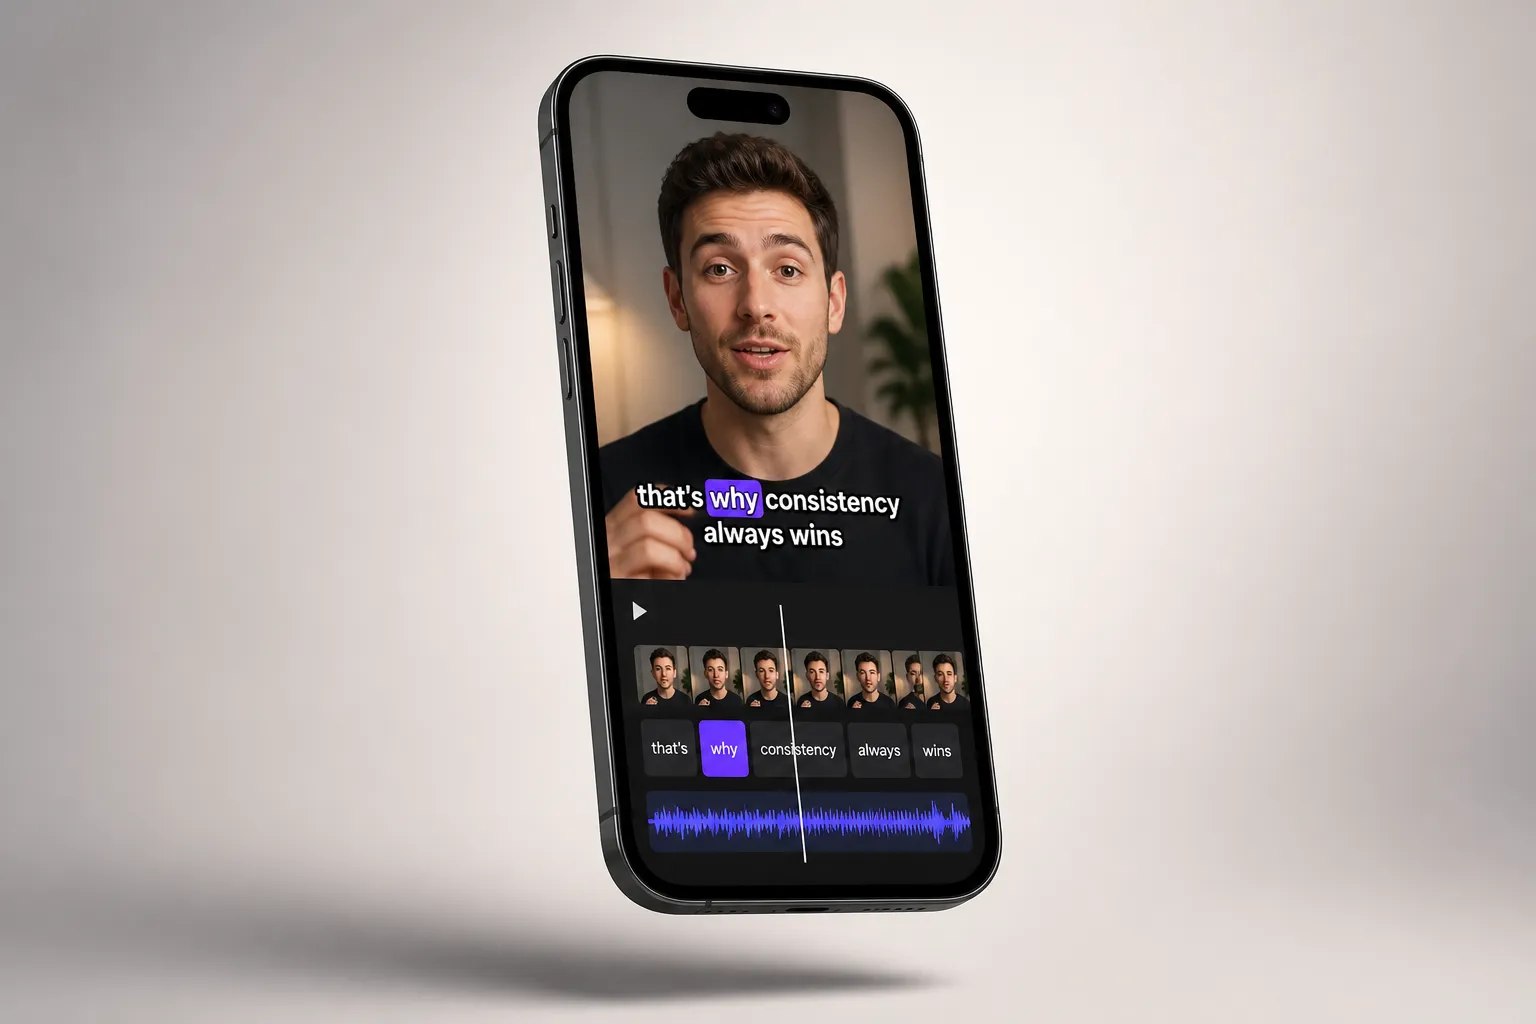
Most people watch Shorts, Reels, and Stories with the sound off. Captions need to be quick to make, accurate, and readable on a phone screen. Use this workflow to auto-generate subtitles, clean the timing, style them for legibility, translate when it helps, and burn them in so your captions look right everywhere.
What a good auto subtitle generator should do
If captions slow you down, look for these features so your workflow stays simple and fast:
- AI Subtitles that transcribe speech in 50+ languages, with word-level highlighting and reliable punctuation.
- Custom vocabulary to lock in names, brands, and jargon so you fix them once and they stay fixed.
- Subtitle Style Customization with animated presets, font, size, color, outline or box backgrounds, and brand kits for one-click consistency.
- Karaoke style captions that highlight per word or per phrase to guide the eye without jitter.
- Translate Subtitles with separate tracks or cloned projects for multilingual posts.
- Burned-In Subtitles so your captions travel with the video on every platform that ignores sidecar files.
- Change Aspect Ratio and safe-area guides so text never hides behind UI buttons.
- Timeline Editing with ripple trim, blade cut, and snap so you can tighten dialogue without leaving the caption flow.
- Export and upload presets for TikTok, Instagram, and YouTube, plus sidecar .srt or .vtt if you need them.
- Add Music and simple mixing so dialog stays clear.
- AI Thumbnail Generator for a fast, on-brand cover image.
Step-by-step: Add subtitles to video online
-
Set your canvas and aspect ratio.
Create a new project and pick the final format first. Use 9:16 for TikTok, Reels, and Shorts, 16:9 for YouTube long-form, and 1:1 or 4:5 for feeds. For 1080x1920 vertical, keep captions at least 120–160 px above the bottom to avoid UI, and leave 5–8% padding from the left and right edges. Turning on safe-area guides now prevents cropping later.
-
Import your clip and trim the fat.
Upload your footage, then cut dead air and tighten the open. Aim for a hook in the first 3 seconds. Use ripple trim so gaps close automatically and align cuts with natural breaths. If a joke or tip lands on a cut, plan the caption break on that same cut for a clean feel.
-
Generate AI subtitles.
Run AI Subtitles and pick the spoken language. Add custom terms for product names and slang. Let the pass finish, then scan for proper nouns and numbers, which transcription models often miss. If you have multiple speakers, label them or color their names for clarity.
-
Clean up text and timing.
Keep subtitles to two lines and about 32–42 characters per line. Break lines at natural pauses and avoid splitting a phrase across lines. Target a reading speed under 17 characters per second. If a caption flashes too fast, split the sentence or trim filler words in the timeline. Word-level highlighting makes it easy to spot where timing is rushed.
If you are captioning an app walkthrough, like a quick demo of the CoinDrop app, keep on-screen steps short and action-first so viewers on mute can follow along.
-
Pick a style and make it legible.
Choose a readable sans-serif like Inter, Open Sans, or Montserrat. For 1080x1920 vertical, set body captions around 44–60 px, depending on line length. Use high-contrast color, a subtle shadow, or a semi-opaque box. A soft box at 20–30% black behind text or a 2–4 px outline keeps type visible on busy footage. Aim for a contrast ratio around 4.5:1 or better. Stick to one or two brand colors to avoid visual noise.
-
Try karaoke subtitles for engagement.
Enable karaoke highlights for list videos, explainers, and hooks. Use a bright active color and a neutral base color. Keep the highlight smooth with a small ease in and out so the bounce does not feel jittery. If the speaker is very fast, merge filler words into one highlight or trim them so the eye can keep up.
-
Translate if you want more reach.
Create localized captions for key markets. Keep idioms simple so meaning survives translation, and avoid culture-specific wordplay. If your audience is split across two languages, export separate versions so each has clean on-screen text. For right-to-left languages, switch alignment and verify punctuation before export.
-
Add music without leaving the editor.
Drop in a track and keep dialogue on top. Set background music about 12–18 dB lower than the voice. If the beat fights the reading pace, pick a simpler track or dip the music under dense lines. Avoid lyrics that compete with what is on screen.
-
Burn subtitles into the video and export.
When styling and timing are locked, choose Burned-In Subtitles. This preserves how captions look on every platform. Export H.264 .mp4, match your source frame rate, and use a 16–25 Mbps target for 1080p. For YouTube long-form, you can also generate a sidecar .srt to help search while keeping the on-brand burn-in for Shorts.
-
Final checks before you post.
Watch your export on mute, on a phone, at 1x speed. If you miss a beat or a joke, slow that caption down or split it. Check that text does not sit under platform UI, and that every caption change matches a visual cut. Keep sentences tight for shorts, and add a beat between complex lines on longer YouTube videos.
-
Create a quick cover image.
Use AI Thumbnail Generator to match your caption style. Keep titles short and bold. Sizes that work: 1280x720 for YouTube 16:9, 1080x1920 for vertical, and 1080x1350 for 4:5. High contrast, no tiny text.
Make karaoke style captions work for you
Use color for meaning
Pick one color for the active highlight and a neutral for the rest. Save bright accents for keywords and calls to action. Keep colors consistent across videos so returning viewers know what to look at.
Keep the bounce readable
Match the highlight to the actual word timing. A slight ease makes the motion feel natural. If a line reads too fast, group short words into one highlight or trim the sentence so the bounce stays comfortable.
Protect the subject
Do not cover faces or key product details. For tight vertical shots, move captions to the upper third during key moments. If you add emojis for emphasis, cap it at one per line so the text stays scannable.
Common pitfalls and how to avoid them
- Trusting AI blindly. Names, brands, and slang often need correction. Do a quick human pass before export.
- Low contrast text. Thin fonts and light colors get lost on busy footage. Add an outline or a background box and increase size.
- Wrong aspect ratio. Cropping kills captions. Set the ratio at the start and preview safe margins.
- Too many effects. Animated styles are fun, but pick one style and stick with it. Viewers should read, not chase motion.
- No burned-in backup. Some platforms mishandle separate caption files. Burn subtitles into video to guarantee consistency.
- Overlong lines. Most viewers are not fast readers. Keep to two lines, limit characters per line, and slow dense captions.
- Audio fighting the text. Loud music makes reading harder. Keep music well under the voice or duck it during heavy lines.
- Platform UI overlap. TikTok and Reels place buttons over the lower and right edges. Keep captions clear of those zones.
Key takeaways
- Set aspect ratio and safe areas first, then auto-generate and clean your AI subtitles.
- Style for legibility before flair. Use high contrast, readable size, and consistent brand colors.
- Add karaoke highlights where they help attention, not everywhere.
- Translate when it adds reach, and export separate language versions for cleaner frames.
- Burn subtitles into video for reliable playback, then spot-check on a phone with sound off.