Your captions look perfect in the editor, then TikTok buttons sit on top of them, YouTube recompression softens the edges, or auto-captions stack a second subtitle track. If you want consistency, you need to burn subtitles into video so every viewer sees clean, readable text.
This guide shows how to hardcode crisp captions with SubtitlesFast, set safe areas that dodge app chrome, pick export settings that survive a second encode, and ship files ready for TikTok, YouTube, Reels, and more. You will also get quick QA steps that catch problems before you post.
When to hardcode captions
Hardcoded captions are baked into the pixels of your MP4. They cannot be toggled off and they render the same on every platform and embed. Use them when control and readability matter more than toggle-on accessibility.
- Silent-first feeds. Shorts, Reels, and Stories autoplay on mute. Burned-in text wins the first three seconds.
- Brand control. Keep your font, weight, shadow, and colors consistent across apps and devices.
- Shorts and Reels. Some mobile players crop or reposition text layers. Burned-in captions keep layout stable.
- Ads, trailers, and product demos. Guaranteed legibility and style are worth more than the ability to hide captions.
- Music and lyrics. Karaoke subtitles benefit from exact timing and animated word highlights you design once.
SubtitlesFast gives you an AI subtitles generator for fast timings with speaker-aware segmentation, or you can add subtitles to video online manually. With songs, the animated karaoke subtitles editor lets you mark beats and per-word highlights so the animation lands exactly on the music.
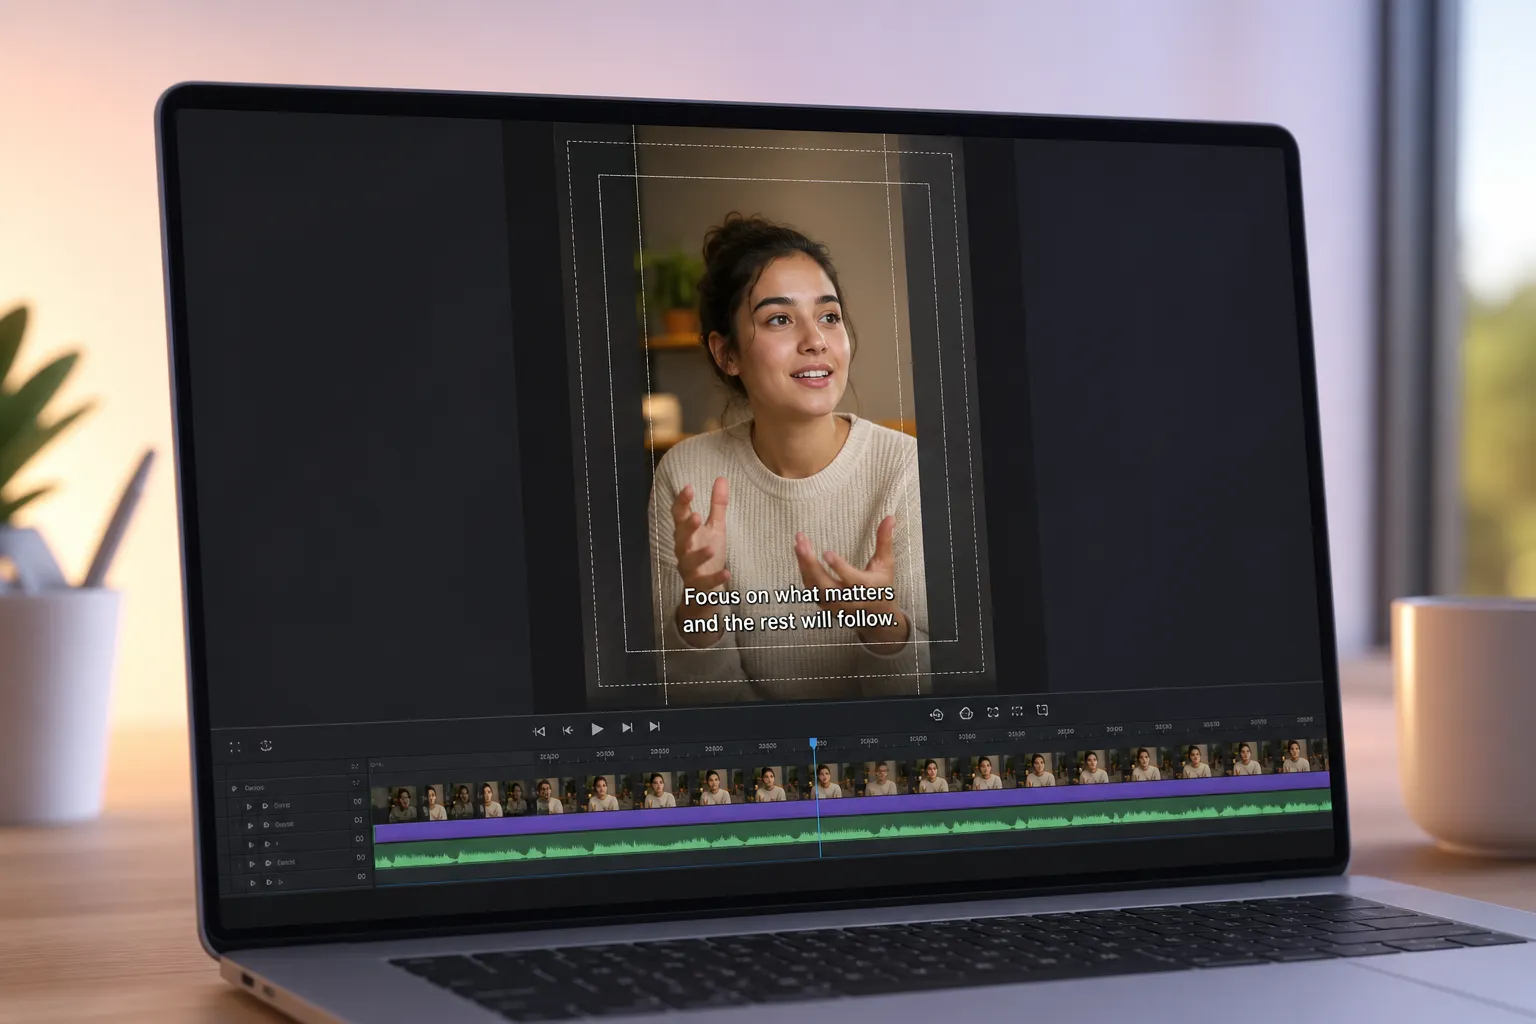
Set frame size and safe areas
Good burned-in captions start with the right canvas. Different platforms use different aspect ratios and UI overlays that can collide with text. Get the frame and guides right before you style anything.
- Pick the right aspect ratio. Choose a preset that matches your destination. Use 9:16 (1080×1920) for TikTok, Reels, and YouTube Shorts, 16:9 (1920×1080) for YouTube landscape, and 1:1 only if your channel still posts square. Fill the frame. Do not letterbox unless you have a clear design reason.
- Enable safe area guides. Turn on safe areas to see where app overlays live. On 9:16, keep your caption baseline well above the bottom UI cluster. Simple rule: leave 10 to 12 percent vertical padding at the bottom and at least 5 percent on the sides. At 1080×1920 that is roughly 192 to 230 pixels bottom padding and 54 pixels on each side.
- Lock the text baseline. In the captions panel, set a consistent Y position for all lines and lock it. Avoid drift between cuts. If you use top captions for emphasis, keep them within the top 12 to 15 percent safe area to avoid titles and stickers.
- Use a readable style. For 1080×1920, size captions to 2 to 4 percent of frame height. Pick a bold or medium font with good x-height. Aim for high contrast. Add either a 60 to 80 percent black box with 8 to 16 pixels padding and 12 to 24 pixels corner radius, or a crisp outline. If you outline, use 3 to 4 pixels at 1080p. SubtitlesFast styles snap to pixel boundaries to keep edges sharp after compression.
- Handle multi-line blocks. Cap lines at 32 to 40 characters and allow up to two lines. Set line height to 120 to 135 percent so blocks breathe. Keep the second line no closer than 3 percent from the bottom safe area to avoid UI collisions. Break lines at natural phrase boundaries, not mid-word.
Timing also affects readability. Keep each subtitle on screen long enough to read comfortably. A quick rule: minimum 1 second, maximum 6 seconds, and aim for about 16 characters per second. Merge or split lines to hit those targets.
Pro tip for karaoke subtitles
For lyric videos, place the highlight bar or per-word color change slightly above the main caption baseline and keep it within the safe area. A 24 to 40 pixel gap at 1080×1920 keeps the animation clear of the like and comment stack while staying within title-safe bounds. Use an accent color that still has 4.5:1 contrast against the background layer.
Choose codecs and bitrates
Subtitles are only as sharp as the encode. Over-aggressive compression blurs edges and ruins readability. Pick export settings that survive the platform’s re-encode without turning white text to gray mush.
- Container and codec. Export MP4 with H.264 for universal playback. Use High profile, level 4.2 for 1080p and level 5.1 for 4K. Set pixel format to yuv420p for compatibility. If your platform supports H.265/HEVC, you can cut bitrate while keeping clarity, but H.264 remains the safest default.
- Frame rate and CFR. Export a constant frame rate. Use 30 fps for most Shorts or 60 fps if your footage was shot at 60 and you want extra smooth UI and lyric highlights. Avoid variable frame rate from screen recordings, which can desync captions.
- Bitrate targets. For 1080p 9:16, use 8 to 12 Mbps. For 720p, 5 to 7 Mbps. For 4K, 35 to 45 Mbps on H.264. Two-pass VBR with a sensible ceiling helps keep text edges clean without bloating file size.
- Keyframe interval. Set 2 seconds. Shortform platforms seek often, and tighter GOPs reduce smear on quick cuts and animated captions.
- Color and levels. Stick with Rec.709. Use full-range video only if your footage is graded that way and you control the full pipeline. To avoid surprises, preview a test export on your phone before rendering the final file.
- Audio. Use AAC at 48 kHz, 192 to 320 kbps. Music and karaoke tracks benefit from 256 kbps or higher to keep sibilants clean. If you normalize, keep peaks under −1 dBFS to prevent inter-sample clipping after upload.
SubtitlesFast export presets bundle these choices per platform. Pick TikTok, YouTube, or Instagram and you get the right aspect ratio, CFR, bitrate, keyframes, and audio without memorizing numbers.
Avoid double captions and platform traps
Burned-in plus auto-generated equals clutter. Before you post, decide whether the platform should add its own captions.
- Decide on platform captions. If you burn subtitles into video for TikTok or Reels, do not also add stickers or text layers that repeat the same lines. On YouTube long-form, you can upload an SRT as an accessibility option while still burning minimal on-screen text for key lines. Avoid duplicating the full subtitle twice.
- Turn off auto-captions if needed. When a platform offers automatic captions at upload, uncheck it for videos with hardcoded text. If you already posted, many apps let you edit and disable captions on the video after the fact.
- Mind accessibility. Hardcoded captions are not machine-readable. If discoverability and screen-reader support matter, include the transcript in the description or upload a sidecar file on platforms that support it. SubtitlesFast can export SRT and VTT alongside your burned-in MP4.
- Watch for sticker collisions. Creator tools add overlays after upload. Leave headroom for titles at the top and stay clear of the bottom right where like, comment, and share buttons stack. Safe habit: reserve the top and bottom 12 percent for app chrome.
Common pitfalls
- Using thin fonts that vanish after compression.
- Placing text within 4 percent of the bottom edge in 9:16, which collides with app chrome.
- Uploading low bitrate files that get re-encoded into a blurry mess.
- Letting sidecar captions stay on, which duplicates text on desktop players.
- Exporting variable frame rate, which drifts subtitle timing.
Export and QA
Once your timing, style, and layout are set, export with a preset, then run a fast review on real devices. Thirty focused minutes here saves failed posts later.
- Pick a platform preset. In SubtitlesFast, choose TikTok 1080×1920, YouTube Shorts 1080×1920, or YouTube 1920×1080. The preset locks safe areas, CFR, codec, bitrate, keyframes, and audio.
- Export to MP4 with burned-in subtitles. SubtitlesFast renders text at native resolution with subpixel positioning so edges stay crisp after platform re-encode.
- Phone check. AirDrop or share a 30 second spot test. Watch on iOS and Android if you can. Look for cropping, blur on motion, aliasing on outlines, and any clash with UI icons.
- Readability check. Read each line aloud before it disappears, at arm’s length, with sound off and screen brightness at 70 percent in bright light. If you stumble, increase size, add a box, or improve line breaks.
- Timing and motion. Jump to fast cuts, wipes, and lyric highlights. The animated karaoke timing should land on the beat without lag. If it feels late, nudge the highlight earlier by a few frames.
- Final sweep. Scan for typos, smart quotes, emoji rendering, and names. Confirm the frame rate and file size look right for the target platform.
- Publish and monitor. After posting, watch the live video. If auto-captions appeared, toggle them off to avoid duplication. Reply to early comments if viewers flag readability issues.
If your videos also live on your homepage or product pages, a web design agency can help place and compress them so they load fast, look sharp, and support conversions. The right partner also understands structured data and SEO, which helps captioned clips pull their weight on site.
SubtitlesFast is built for speed. Use the AI subtitles generator when you have dialogue-heavy clips, or switch to the animated karaoke subtitles editor for music. Either way, you can add subtitles to video online in minutes, burn them into a clean MP4, and push a version that survives every feed.
Key takeaways
- Hardcode when you need guaranteed style and readability across platforms and embeds.
- Use platform aspect presets and respect safe areas to avoid UI collisions.
- Export H.264 MP4 with CFR, sensible bitrates, and a 2 second keyframe interval for sharp text.
- Choose between burned-in and auto-captions. Do not ship both on the same video.
- QA on real phones before posting. Adjust font size, contrast, and timing as needed.