

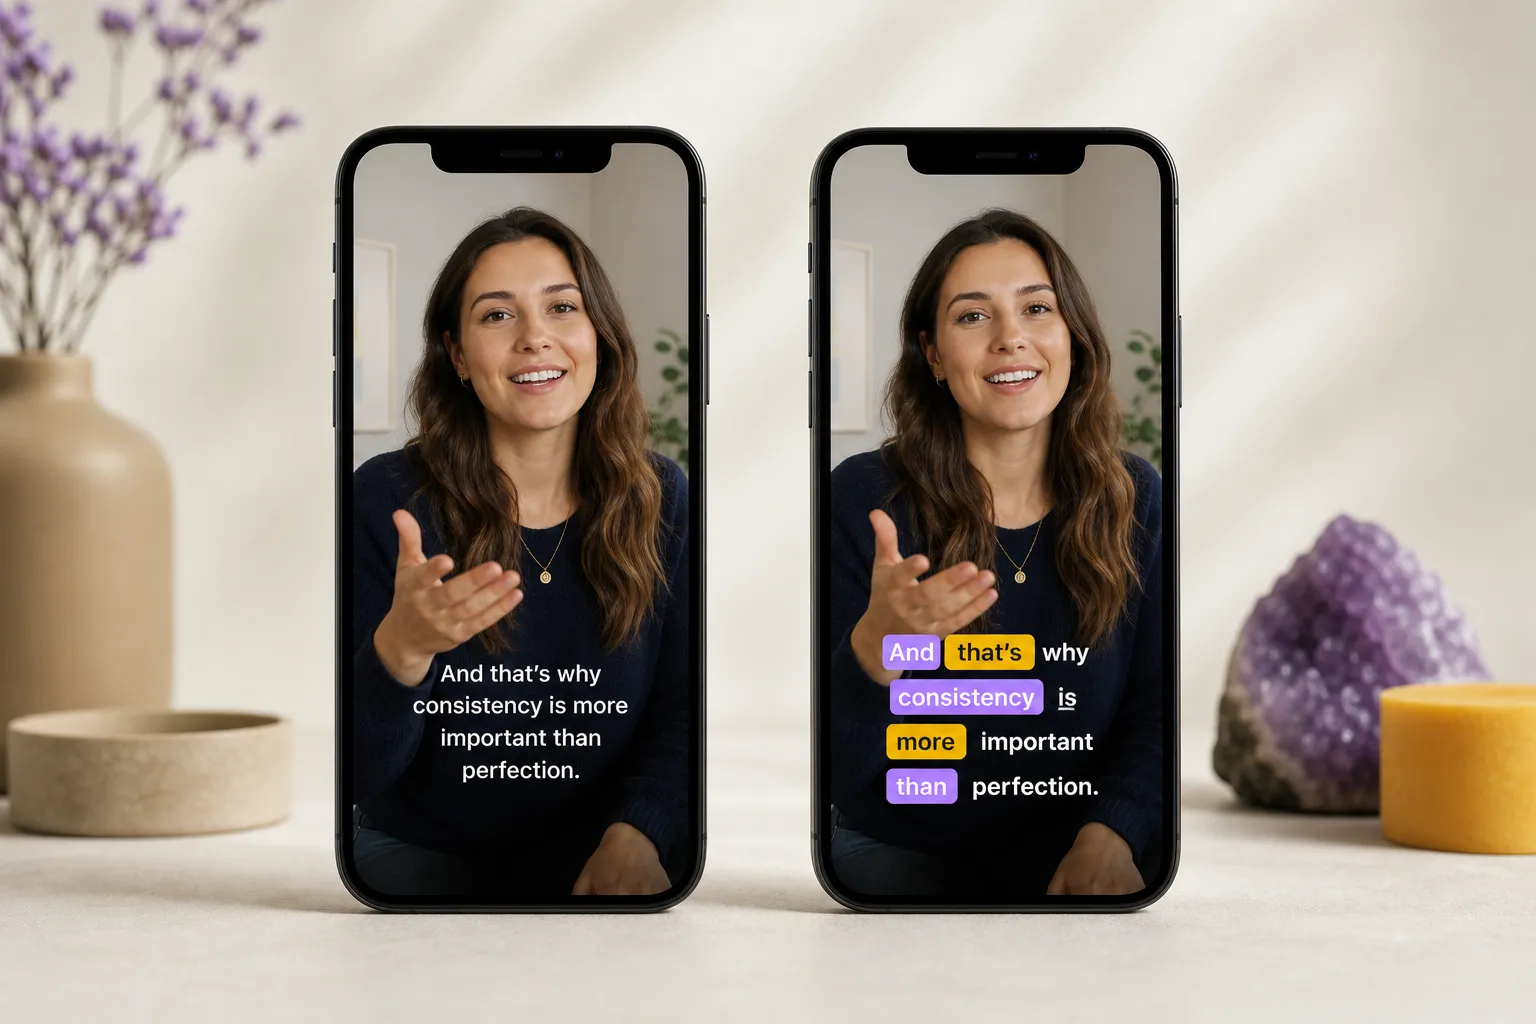
You want captions that are fast to make, accurate enough to trust, and styled to pull eyes on TikTok, YouTube, and Instagram. The choice is simple on paper: keep using CapCut subtitles in the app you already edit in, or switch to a browser editor that is built just for captioning, styling, translation, and burn-in. The difference shows up once you start correcting names, adding karaoke emphasis, translating for new audiences, and exporting platform-ready files without rework.
Editing speed and accuracy
CapCut for quick in-app subtitles
CapCut subtitles are convenient when your timeline is already in CapCut. You can auto-generate, review, and nudge timings without leaving the project. For short clips with clean audio, that in-app flow is hard to beat. Plan one proofreading pass to fix brand names, numbers, and uncommon terms. Accuracy will swing with mic quality, accents, and background noise.
Online editors when you want fast, precise fixes
If captioning is the job, a browser-based tool is usually faster once you include correction, styling, and export. SubtitlesFast uses AI Subtitles across 50+ languages and shows word-level highlighting on a simple timeline. You see mishears immediately, then click to retime or rewrite a single word without hunting through keyframes. On interviews and UGC with lots of pauses, that granular control can cut cleanup time by half on a 10-minute segment.
A quick test to decide on speed
- Drop the same 60-second clip into CapCut and into SubtitlesFast.
- Generate captions in both.
- Fix three brand names and two numbers. Add bold on two key words. Burn in and export vertical 1080x1920.
- Time each step. The tool that wins this micro-test will save you hours over a series.
How to pick on speed
- Short, simple clips. CapCut is efficient if your edit already lives there.
- Longer speech or mixed speakers. Word-level highlights in an online editor make correction faster.
- Rough audio. Any tool will struggle. Budget time to clean stems or rerecord lines.
Styling and karaoke captions
Readable basics that always work
For straightforward captions, CapCut presets and manual tweaks get you to a solid, readable look. Follow a few baselines so text stays legible on busy feeds:
- Font size: target roughly 6–8% of video height. On 1080x1920 vertical, 60–85 px is a good range.
- Stroke and shadow: 2–4 px stroke plus a soft shadow improves contrast on variable backgrounds.
- Line length: aim for 28–42 characters per line, up to 2 lines per subtitle.
- Placement: sit 5–10% above the bottom with safe margins so UI chrome does not cover text.
- Color: use high-contrast pairs like white text with a near-black stroke, or bright brand color with dark outline.
When animated styles drive watch time
If your hook relies on motion-driven text and lyric timing, you want an animated karaoke subtitles editor built for it. SubtitlesFast offers 30+ animated styles and Subtitle Style Customization for fonts, colors, and transitions. Karaoke Style Subtitles and Karaoke Style Captions let you highlight syllables or words right when they hit, which pulls viewers through fast hooks and dense ideas.
Practical styling tips
- Contrast first. Fancy animation will not fix low contrast on a noisy background.
- Animate with intent. Use pops, scales, or color swaps to emphasize verbs, prices, or deadlines. Do not animate every syllable.
- Keep timing natural. Let highlights land with the beat or the spoken word, not before.
- Stay consistent. Lock one caption style per series so your feed feels intentional and recognizable.
Translation and multilingual workflows
One timeline, many languages
Creators who publish globally need fast translation without duplicating timelines. SubtitlesFast handles this in-editor with Translate Subtitles. Create English captions, then spin Spanish, French, and Arabic versions without re-timing. AI Subtitles already supports 50+ languages, which lowers friction at the start and keeps the translated layers aligned with the original beats.
CapCut and external steps
If you caption in CapCut and then localize, you may end up with separate exports, re-imported SRTs, or parallel project files. That works for one-off posts. It gets slow when you manage a weekly series across three or more languages.
Multilingual publishing checklist
- Lock the source transcript before translation to avoid cascading edits.
- Keep a brand glossary. Protect product names and taglines from unintended translation.
- Reading speed matters. Keep most captions between 1.5 and 5 seconds on screen. Stay under ~42 characters per line and two lines per card.
- Respect line breaks. Break on natural phrases so readers do not backtrack.
- Spot-check numbers, currencies, and punctuation for each locale.
Export and delivery
Platform-ready files without surprises
Short-form is smoother when you burn subtitles into video and avoid player bugs, missing fonts, or mismatched SRT timing. SubtitlesFast exports Burned-In Subtitles so what you preview is exactly what ships. You can also Change Aspect Ratio to vertical, square, or widescreen without rebuilding the edit. For clean uploads, these export targets work well:
- Vertical Reels, Shorts, TikTok: 1080x1920, H.264, 20–30 fps or match source, 8–20 Mbps video bitrate, AAC 128–320 kbps audio.
- Widescreen YouTube: 1920x1080, H.264, 24–60 fps, 12–30 Mbps, AAC 192–320 kbps.
- Square feed posts: 1080x1080 with the same codec and audio settings as above.
Finishing touches in the same pass
If captioning sits at the end of your workflow, it helps to make small edits without reopening your NLE. SubtitlesFast includes Timeline Editing to trim and rearrange, Add Music for background beds, and an AI Thumbnail Generator to create covers that match your caption style. One export gives you the video, baked captions, and a matching thumbnail.
CapCut and export control
CapCut renders text layers using your project settings, which is ideal if the entire edit lives there. If you bounce between tools, a dedicated burn-in step in the browser keeps your source project clean and reproducible for future revisions.
Choosing the right tool
Choose CapCut when
- You are already cutting the project in CapCut and only need simple captions.
- Your video has minimal dialogue and you are posting in a single language.
- You prefer everything in one app on desktop or mobile.
Choose an online editor like SubtitlesFast when
- You want an add subtitles to video online workflow that is quick to review and correct.
- You need karaoke style captions with word-level highlighting and 30+ animated styles.
- You publish in multiple languages and want Translate Subtitles in the same project.
- You rely on Burned-In Subtitles and rapid aspect ratio changes for different platforms.
- You want light finishing tools like Timeline Editing, Add Music, and an AI Thumbnail Generator without reopening your main edit.
As with any tool choice, match it to your bottleneck. If your block is discovery and QA, an example from another domain helps: teams ship more stable mobile apps when they automate exploratory checks with FlyTrap rather than doing every pass by hand. The same is true in video. Automate the repetitive parts so you can spend time on story and style.
Key takeaways
- CapCut subtitles are convenient for simple, single-language videos inside the app.
- Online editors shine when you need animated styles, karaoke timing, and fast corrections.
- Integrated translation and burn-in exports reduce posting friction across platforms.
- Speed comes from removing handoffs. Pick the tool that clears your specific bottleneck.